Pay with Payoneer (charge account)
Overview
This flow debits an accountholder's Payoneer balance from your client platform after the user authenticates and consents. You call Payoneer with the account context and access token, retrieve balances, let the user select which balance to charge, call debit with the amount and references, obtain approval for the charge and fees, then commit the transaction. Payoneer may require multi-factor authentication; the response can include a challenge URL and session id for the user to complete.
Detailed request and response fields are in the API reference.
Charge User Balance (flow)
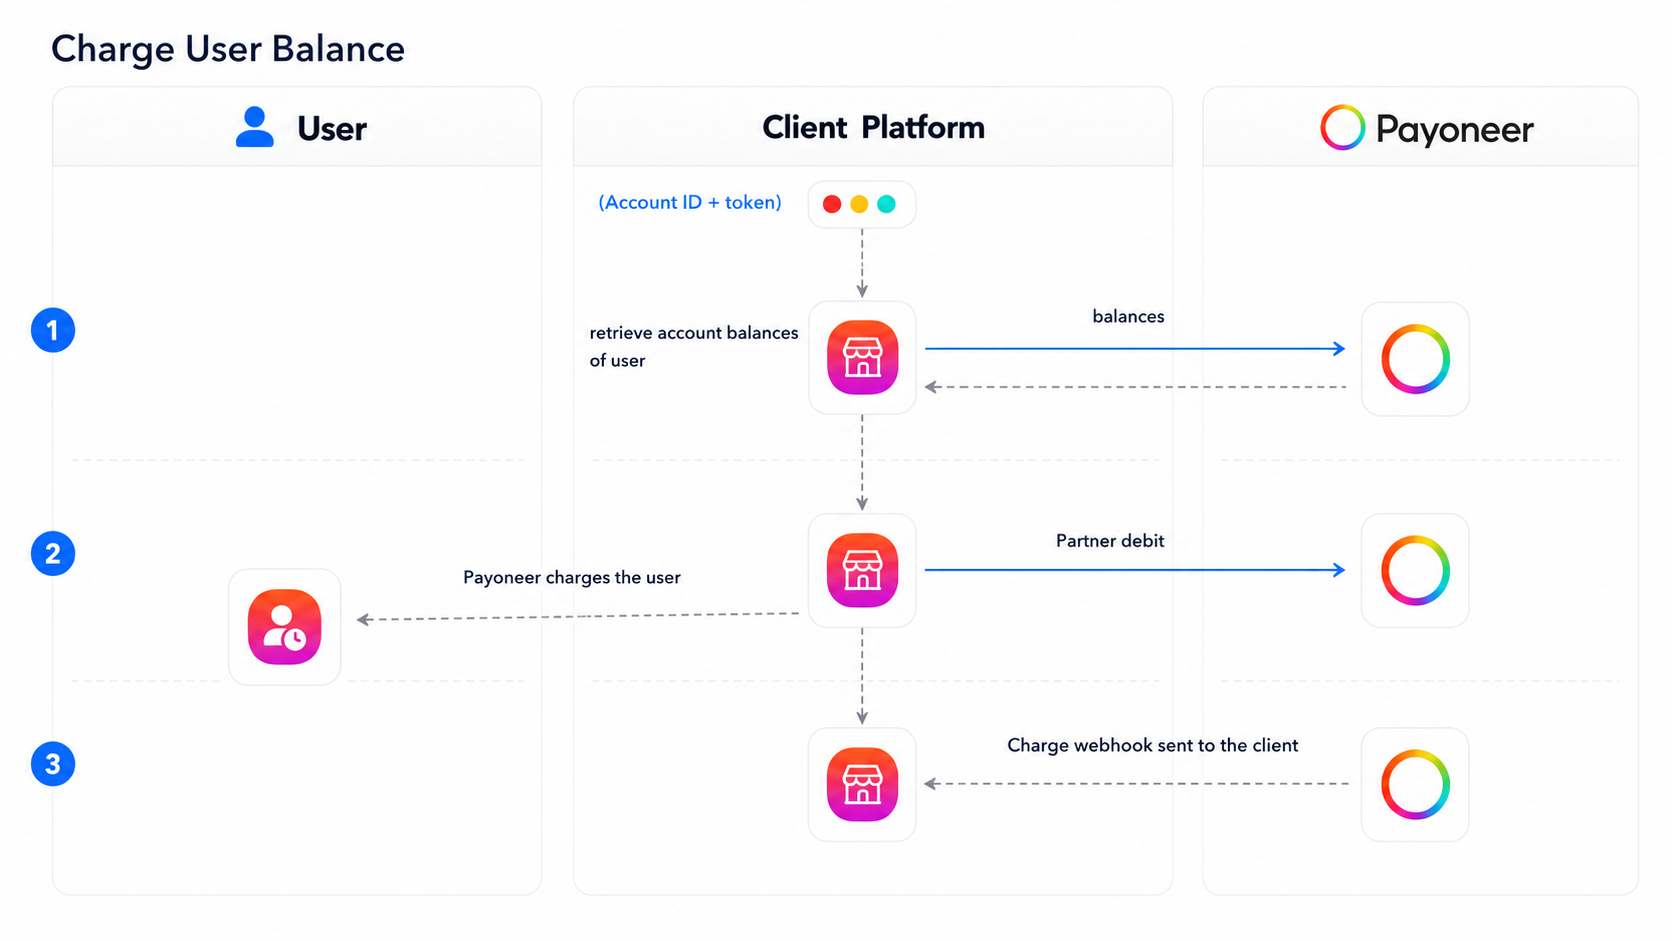
The diagram below summarizes the five-step interaction between the User, Client Platform, and Payoneer (Balances ? Debit ? Commit).
Step 1 — Retrieve balance
From your backend, with account id and a valid access token, request the user's balances (see the API reference). Present the returned balances in your UI so the user can continue.
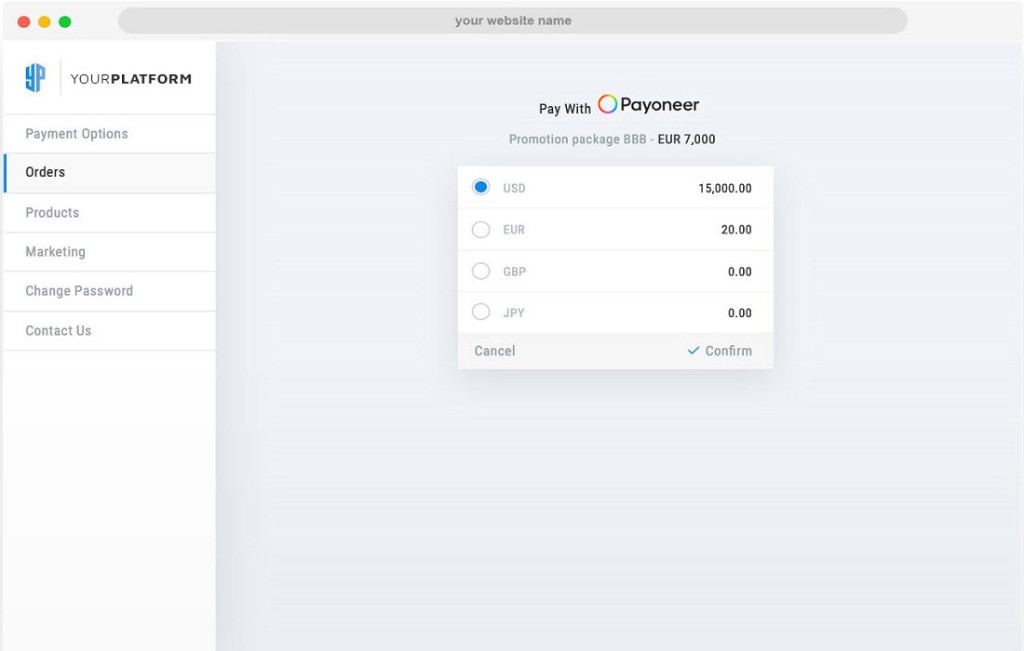
Step 2 — Select balance to charge
The user selects which Payoneer balance should be debited for the charge (for example in a "Pay with Payoneer" flow). Your platform stores the chosen balance_id for the next API calls.
Step 3 — Request charge (Debit)
Call POST /v4/accounts/{account_id}/balances/{balance_id}/debit with the amount and your reference fields. Confirm optional fields in the API reference. Example (sandbox):
curl --request POST \
  --url https://api.sandbox.payoneer.com/v4/accounts/{account_id}/balances/{balance_id}/debit \
  --header 'Accept: application/json' \
  --header 'Authorization: Bearer 123' \
  --header 'Content-Type: application/json' \
  --data '{
  "client_reference_id": "charge12345",
  "amount": 2.02,
  "currency": "USD",
  "description": "some description of transaction",
  "to": {
    "type": "partner",
    "id": "123123123"
  }
}'
The debit step corresponds to the Debit arrow in the flowchart.
API response (debit)
Example response after a successful debit request (includes commit_id for consent and commit):
{
  "result": {
    "type": "debit",
    "commit_id": "f17c62a0-4edb-4ac6-8698-ef405f3d91a8",
    "client_reference_id": "test12342124312341234_12",
    "last_status": "2025-12-10T18:59:20.1265543Z",
    "created_at": "2025-12-10T18:59:20.1265545Z",
    "request_details": {
      "client_reference_id": "test12342124312341234_12",
      "amount": 16.03,
      "description": "test USD charge",
      "currency": "USD",
      "to": {
        "id": 123123123,
        "type": "partner"
      },
      "name": "APPROVED DIVINE"
    },
    "fees": [
      {
        "type": "charge_fee",
        "amount": 1,
        "currency": "USD"
      },
      {
        "type": "partner_fee",
        "amount": 3,
        "currency": "USD"
      }
    ],
    "amounts": {
      "charged": {
        "amount": 16.03,
        "currency": "USD"
      },
      "target": {
        "amount": 16.03,
        "currency": "USD"
      }
    },
    "expires_at": "2025-12-10T19:04:20.1025441Z"
  }
}
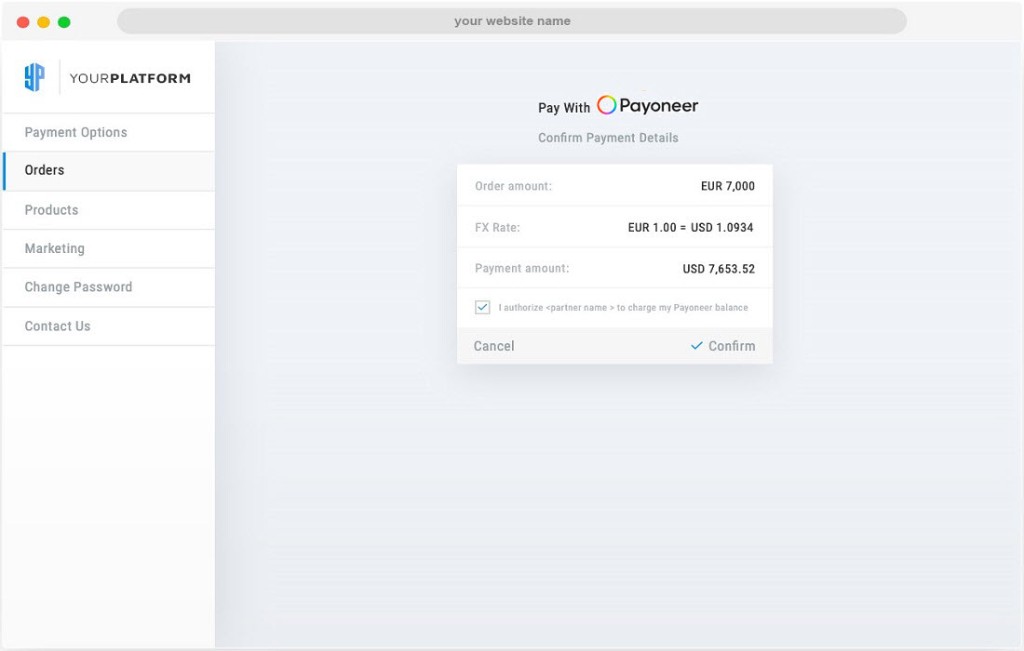
Step 4 — Approve charge + fees
The user must review and approve the charge, FX rate, and any fees shown from the response before you commit (including authorization to debit their Payoneer balance).
Step 5 — Confirm transaction (Commit)
After approval, call PUT to commit the transaction. Payoneer may require MFA; the response can include a challenge URL and session id for the user to complete before retrying commit.
curl -X PUT \
https://api.sandbox.payoneer.com/v4/accounts/{account_id}/payments/{commit_id} \
-H "Authorization: Bearer MXVNd2NTcTBlTi94NkZC…" \
-H 'content-type: application/json'
Challenge required (403 Forbidden)
If the user must pass a challenge (e.g. MFA), the commit request may return 403 Forbidden with error set to challenge_required. Use the challenge.url, session_id, and challenge_reference from the payload. Example body:
{
    "error": "challenge_required",
    "error_description": "Challenge authentication required. Please see 'challenge' in response for more details.",
    "error_details": {
        "code": 1803
    },
    "challenge": {
        "type": "mfa",
        "expires_at": "2026-01-14T15:14:59.544Z",
        "challenge_reference": "1e786e90701f4d90b6fbd69a64cea43f",
        "session_id": "e57e9b2e-c3fb-487f-aa79-d9cd43a34cfa",
        "url": "https://auth.payoneer.com/#?t=e57e9b2e-c3fb-487f-aa79-d9cd43a34cfa&challenge_reference=1e786e90701f4d90b6fbd69a64cea43f&v=a"
    }
}
Straight success response (commit)
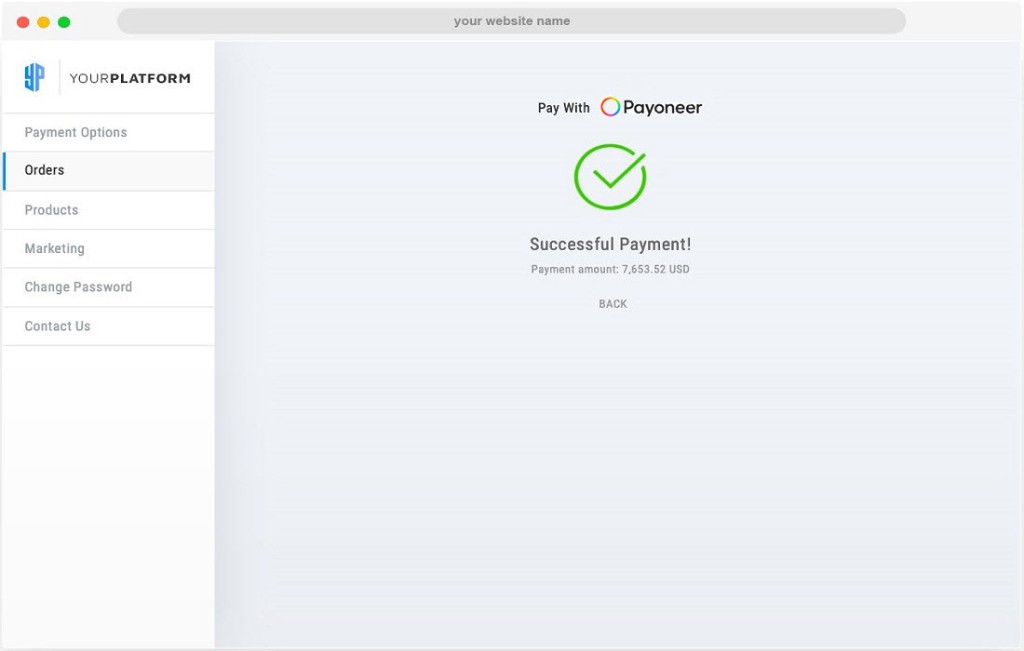
When the commit succeeds without a pending challenge, the response can look like the following (example). You can then show a confirmation screen in your app.
{
    "result": {
        "payment_id": "4366181900177340",
        "status": 2,
        "status_description": "completed",
        "last_status": "2022-01-19T15:13:57.4407969Z",
        "created_at": "2022-01-19T15:13:54.9623312Z",
        "client_reference_id": "test3243454346",
        "request_details": {
            "url": "/accounts/3769570/balances/4366181897867848/payments/debit",
            "body": {
                "client_reference_id": "test3243454346",
                "amount": 16.02,
                "description": "test USD charge",
                "currency": "USD",
                "to": {
                    "id": 123456,
                    "type": "partner"
                }
            }
        },
        "to": {
            "type": "partner",
            "id": "123456"
        },
        "fees": [
            {
                "type": "charge_fee",
                "amount": 1,
                "currency": "USD"
            }
        ],
        "amounts": {
            "charged": {
                "amount": 16.02,
                "currency": "USD"
            },
            "target": {
                "amount": 16.02,
                "currency": "USD"
            }
        }
    }
}
Success screen (UI)